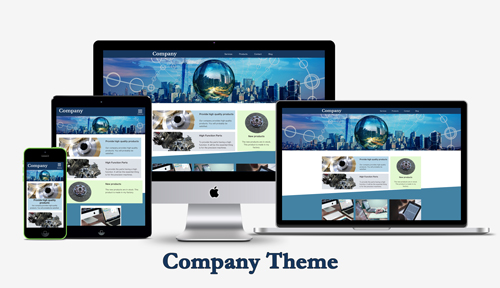
PC&iPad&iPhoneのスクリーンショット
concrete5のマーケットプレイスに掲載していただいています。
PC&iPad&iPhoneのスクリーンショット
画像やテキストをご自身のサイトに合うよう置き換えていただければ色んなサイトで使っていただけます。
このテーマは、サンプルコンテンツ入りテーマです。
コンテンツ入りでテーマをインストールしていただき、ご自分のサイトに合った画像とテキストに置き換えるだけで簡単にアクセシブルなサイト構築を可能にします。
(画像がHTMLブロック等HTMLの記述になっている箇所は、src="画像の保存場所" alt="画像の説明"を必ず記入してください。)
横幅1165以下の環境では、WAI-ARIAを使用したドロワーメニュー(Progressive Hamburger by @heydonworks)を使用しています。(よりアクセシブルになるようほんの少し改良しています)
ドロワーメニューを開いた時は、「×」ボタン又はメニューを選択するまではフォーカスはグローバルナビゲーション内のみの移動になります。
マシンリーダブルな Schema.orgに対応する為、Microdataを使用しています。
グローバルナビゲーション、パンくずリスト、新着情報、FAQを schema.org の仕様に従って記述しています。
スマートフォンでスクロールした状態でもすぐにナビメニューをタップ出来るようにヘッダを固定しています。
(ページ内リンクを設定される時は、(ヘッダの高さが100pxの場合)例:margin-top:-100px;padding-top:100px;をコンテンツエリア等に設定してください。)
facebookの窓 等 横幅を絶対値で指定している箇所を追加される場合、その数値(横幅)より小さいサイズのデバイスで閲覧すると横スクロールバーが出てしまうかレイアウトが崩れる可能性があるのでご注意ください。(ご自身で横幅を調整してください)
Mainエリアには2カラム(Col Twobox)3カラム(Col Threebox)の独自レイアウトを設定出来る様にしています。
デモサイトは、Home | Companyになります。
テーマ「Company」のダウンロードは、concrete5のマーケットプレイス「Company - concrete5」で行ってください。(有料になります)
role="presentation"を削除しています。デフォルトのままだとtitle要素がサイト名 :: ページ名なので、ページ名 | サイト名に変更してください。修正方法は下記の通りです。
concrete5/config/concrete.phpの868行目を 'title_format' => '%1$s :: %2$s',から''title_format' => '%2$s :: %1$s',に変更してください。
参照:設定ファイルの使い方 :: concrete5 Japan 日本語公式サイト
尚、concrete5 Ver.8から[ページタイトル] :: [サイト名]がデフォルトになるので、上記の修正は必要なくなりました。参照:title要素について質問及び要望です。 :: concrete5 Japan 日本語公式サイト
記事ブロックで画像を追加しそのまま保存するとaltの値が空になってしまうので、追加した画像をクリックしポップアップ編集画面でaltの値を適切な値を入力してください。
尚、concrete5 Ver.8から上記の注意は必要なくなりました。
編集ページの該当のエリアでレイアウトを追加を選びプリセットの「Col Twobox」(2カラムの場合)又は「Col Threebox」(3カラムの場合)独自レイアウトを選択し、レイアウト追加をクリックしてください。
Ver7.5.13の場合は、HTMLブロックを使わず、記事ブロックを使ってサイト名を修正してください。(HTMLブロックを使うと自動的に<div id="HTMLBlock167" class="HTMLBlock">が入力されてしまう為)
また、記事ブロックを使って画像に変更する場合は、画像アイコンをクリックして画像を追加した後、HTMLアイコンをクリックしてp要素を削除してください。
Ver8の場合は、Header Site Title Area の 記事ブロックを削除し、HTMLブロックで
<a href="/">サイト名</a>コンテンツ入りでインストールし、情報を自分のサイトに合うよう修正するために記事ブロックで編集しようとすると、自動的に不要な要素が入る上に必要な要素が削除されてしまいます。ですので、下記のコードをコピペしてご自分のサイトに合うよう修正してください。
トップページのMain Topエリアの部分は、下記のようにマークアップしてください。
※デモサイトのHomeを参考にしてください。
<div class="two-box-long">
  <ul>
  <li><a href="./index.php/products" class="future-parts first-parts">
  <h2>Provide high quality products</h2>
  <img src="./download_file/view/top-img01.png" alt="image photo of Provide high quality products" class="left-side-img">
  <p>Our company provides high-quality products. You will probably be satisfied.</p>
  </a></li>
  <li><a href="./index.php/products" class="future-parts second-parts">
  <h2>High Function Parts</h2>
  <img src="./download_file/view/top-img02.png" alt="image photo of High Function Parts" class="left-side-img">
  <p>To provide the parts having a high function. It will be the essential thing is for the precision machines.</p>
  </a></li></ul>
</div>
<div class="two-box-short">
  <a href="./index.php/products" class="new-future-parts">
  <h2>New products</h2>
  <img src="./download_file/view/top-img03.png" alt="image photo of New products" class="center-img">
  <p>The new products are in stock. This product is made in my factory.</p>
  </a>
</div>
Main Middleエリアの3つのブロックの個々のマークアップは、下記のように記述してください。
※デモサイトのHomeを参考にしてください。
<a href="./index.php/services" class="image-box"><img src="./download_file/view/10/1" alt="image photo of Awesome Features"><h2>Awesome Features</h2><p>What kind of special features does that have? The greatest features are that it's first of the commodity industry.</p></a>ブロックの編集エリアをクリックし、デサイン&カスタムテンプレートをクリックする。一番右のアイコン(titleがカスタムCSSクラス、ブロック名、カスタムテンプレートやスタイルのリセット)をクリックし、カスタムテンプレートから「company_page_title」を選択します。最後に保存をクリックします。
デモサイトの下層ページで使用しているタブUIを使用する場合は、下記のようにマークアップしてください。
※デモサイトのProductsを参考にしてください。
<div id="tabs">
<ul>
<li><a href="#tabs-1">Price</a></li>
<li><a href="#tabs-2">Graph</a></li>
<li><a href="#tabs-3">Photo</a></li>
</ul>
<div id="tabs-1">
<h2 tabindex="0">Price list</h2>
<ol class="grade-list clearfix">
<li class="grade-list-item">
<dl>
<dt class="grade-list-ttl">High grade</dt>
<dd class="grade-list-important">$80</dd>
<dd class="grade-btn"><a href="./index.php/contact" class="company-btn">Contact Us</a></dd>
<dd class="grade-list-desc">100 unit</dd>
<dd class="grade-list-desc">3 years</dd>
</dl>
</li>
<li class="grade-list-item grade-list-item-best">
<dl>
<dt class="grade-list-ttl grade-list-ttl-att">standard</dt>
<dd class="grade-list-important">$50</dd>
<dd class="grade-btn"><a href="./index.php/contact" class="company-btn">Contact Us</a></dd>
<dd class="grade-list-desc">60 unit</dd>
<dd class="grade-list-desc">1 years</dd>
</dl>
</li>
<li class="grade-list-item">
<dl>
<dt class="grade-list-ttl">Basic</dt>
<dd class="grade-list-important">$25</dd>
<dd class="grade-btn"><a href="./index.php/contact" class="company-btn">Contact Us</a></dd>
<dd class="grade-list-desc">30 unit</dd>
<dd class="grade-list-desc">half-year</dd>
</dl>
</li>
</ol>
</div>
<div id="tabs-2">
<h2 tabindex="0">Graph</h2>
<p>Please refer to our company performance.</p>
<svg viewbox="-10 30 400 300" aria-labelledby="graph-title graph-desc" role="img">
<title id="graph-title">Our Company Performance Graph</title>
<desc id="graph-desc">The transition graph of 5 years. 2012 is 20%. 2013 is 40%. 2014 is 80%. 2015 is 60%. 2016 is 70%.</desc>
<rect x="60" y="220" width="20" height="20" fill="#47678e" stroke="#405c7f" id="bar1" />
<rect x="120" y="180" width="20" height="60" fill="#47678e" stroke="#405c7f" id="bar2" />
<rect x="180" y="100" width="20" height="140" fill="#47678e" stroke="#405c7f" id="bar3" />
<rect x="240" y="140" width="20" height="100" fill="#47678e" stroke="#405c7fb" id="bar4" />
<rect x="300" y="120" width="20" height="120" fill="#47678e" stroke="#405c7f" id="bar5" />
<line x1="40" y1="40" x2="40" y2="240" stroke="#4c5f76">
<text y="220" x="0" stroke="#121011">20%</text>
<text y="180" x="0" stroke="#121011">40%</text>
<text y="140" x="0" stroke="#121011">60%</text>
<text y="100" x="0" stroke="#121011">80%</text>
<text y="60" x="-10" stroke="#121011">100%</text>
<line x1="40" y1="240" x2="360" y2="240" stroke="#4c5f76">
<text x="53" y="260" stroke="#121011">2012</text>
<text x="113" y="260" stroke="#121011">2013</text>
<text x="173" y="260" stroke="#121011">2014</text>
<text x="233" y="260" stroke="#121011">2015</text>
<text x="293" y="260" stroke="#121011">2016</text>
</svg>
</div>
<div id="tabs-3">
<h2 tabindex="0">Photo</h2>
<p><img alt="products image" src="./download_file/view/16/157" class="image-frame">
<br>In a professional context it often happens that private or corporate clients corder a publication to be made.</p>
</div>
</div>また、デモサイトの下層ページで使用しているアコーディオンUIを使用する場合は、下記のようにマークアップしてください。
※デモサイトのFAQを参考にしてください。
<div id="accordion" class="ccm-faq-container" itemscope itemtype="http://schema.org/Question">
  <h2 itemprop="name">Do you personally deal possible ?</h2>
  <div itemprop="suggestedAnswer" itemscope itemtype="http://schema.org/Answer">
  <div itemprop="text">
  <p>Lorem ipsum dolor sit amet, consectetuer adipiscing elit. Aenean commodo ligula eget dolor. Aenean massa
  <strong>strong</strong>. Cum sociis natoque penatibus et magnis dis parturient montes, nascetur mus. </p>
  <p><a href="#">More information about company</a></p>
  </div>
  </div>
  <h2 itemprop="name">When is a new product?</h2>
  <div itemprop="suggestedAnswer" itemscope itemtype="http://schema.org/Answer">
  <div itemprop="text">
  <ul>
  <li>Lorem ipsum dolor sit amet consectetuer.</li>
  <li>Aenean commodo ligula eget dolor.</li>
  <li>Aenean massa cum sociis natoque penatibus.</li>
  </ul>
  </div>
  </div>
  <h2 itemprop="name">Tell me about company.</h2>
  <div itemprop="suggestedAnswer" itemscope itemtype="http://schema.org/Answer">
  <div itemprop="text">
  <p>Lorem ipsum dolor sit amet, consectetuer adipiscing</p><p>elit. Aenean commodo ligula eget dolor. </p>
  <p><strong>strong</strong>. Cum sociis natoque penatibus</p>
  </div>
  </div>
</div>Main Bottomエリアのページリストブロックの新着情報は、カスタムテンプレートの「company_new_info」を適用しブログ記事の「タイトル」、「日付」、「説明文」を表示させてます。(ページ名を含めるとページの説明を含めるを「はい」に設定してください。)(カスタムスタイルの「company_new_info」を適用するとデモサイトと同じスタイルになります)
ブログ記事以外のタイトルと同じスタイルにしたい場合は、ブロックの編集エリアをクリックし、デサイン&カスタムテンプレートをクリックします。一番右のアイコン(titleがカスタムCSSクラス、ブロック名、カスタムテンプレートやスタイルのリセット)をクリックし、カスタムテンプレートから「company_page_title」を選択します。最後に保存をクリックして設定完了です。
すべてのカスタムテンプレートについて
以下の環境で表示・動作・読み上げの確認をしています。
concrete5 バージョン5.7.5.9~5.7.5.13, 8.0.0~8.0.3
OS:Windows 7
ProductsページにあるSVGのグラフの読み上げについてですが、PC-Talkerは棒グラフの値部分でどれもタイトルだけを読み上げるという不具合がありました。これはPC-TalkerがまだWAI-ARIAに対応していないからだと推測しています。また、NVDAは同じSVGのグラフ部分の意図した情報を2度読み上げる(情報自体は正確です)ので、その旨報告し2度読みしないよう機能リクエストしています。
ダウンロードしたファイルを解凍し、サーバーにFTPで packages/ にアップロードしてください。管理画面の「concrete5を拡張」の中の「機能追加」をクリックすると「インストール待ち」にテーマCompanyの表示が出るのでインストールをクリックしコンテンツ入りインストールかテーマのみインストールかを選んでインストールしてください。(マーケットプレイスからの追加テーマのインストール方法は、マーケットプレイスの使い方 :: concrete5 Japan 日本語公式サイトをご覧下さい。)
テーマ「Company」は、concrete5 マーケットプレイスの標準ライセンスに基づいてます。詳しくはconcrete5 :: Licenseをご覧ください。
コメント (0件)